> For the complete documentation index, see [llms.txt](https://docs.tessl.io/llms.txt). Markdown versions of documentation pages are available by appending `.md` to page URLs; this page is available as [Markdown](https://docs.tessl.io/distribute/connect-tessl-to-github.md).
# Connect Tessl to GitHub
Connect a GitHub account or organization so Tessl can scan its repositories and report Context and Findings in your Organization.
## Enable the SCM connection
You need the Organization admin role to manage SCM connections.
* Select your Organization from the dropdown at the top of the sidebar.
* Open **Settings**, then **Integrations**.
* Under **Source control**, select **Add** next to GitHub.
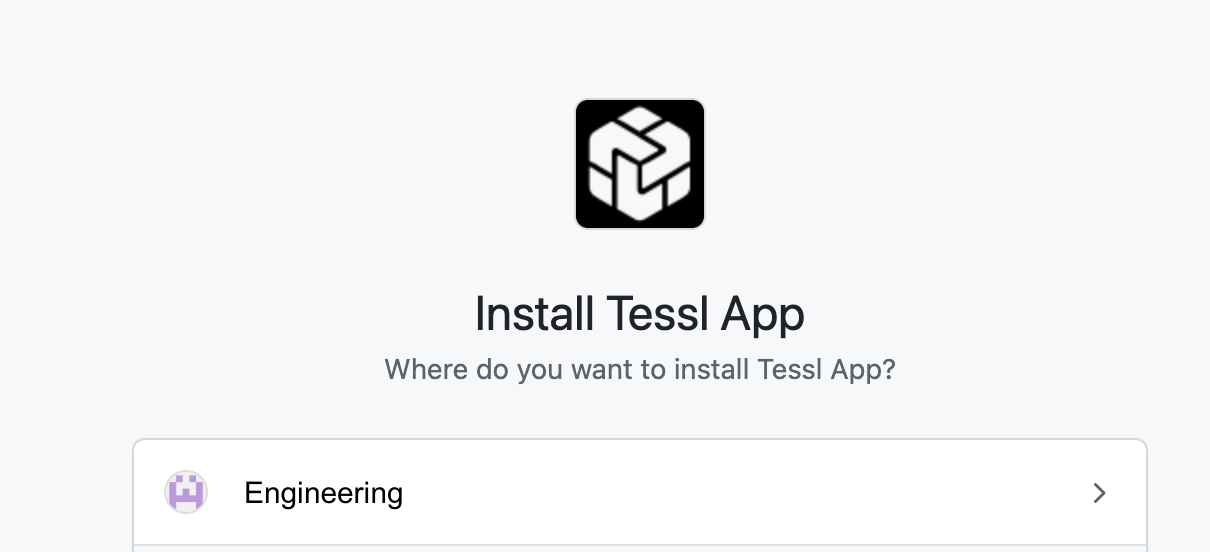
* Select the GitHub organization or account to add the Tessl App to. Accounts that already have Tessl will not have the option.
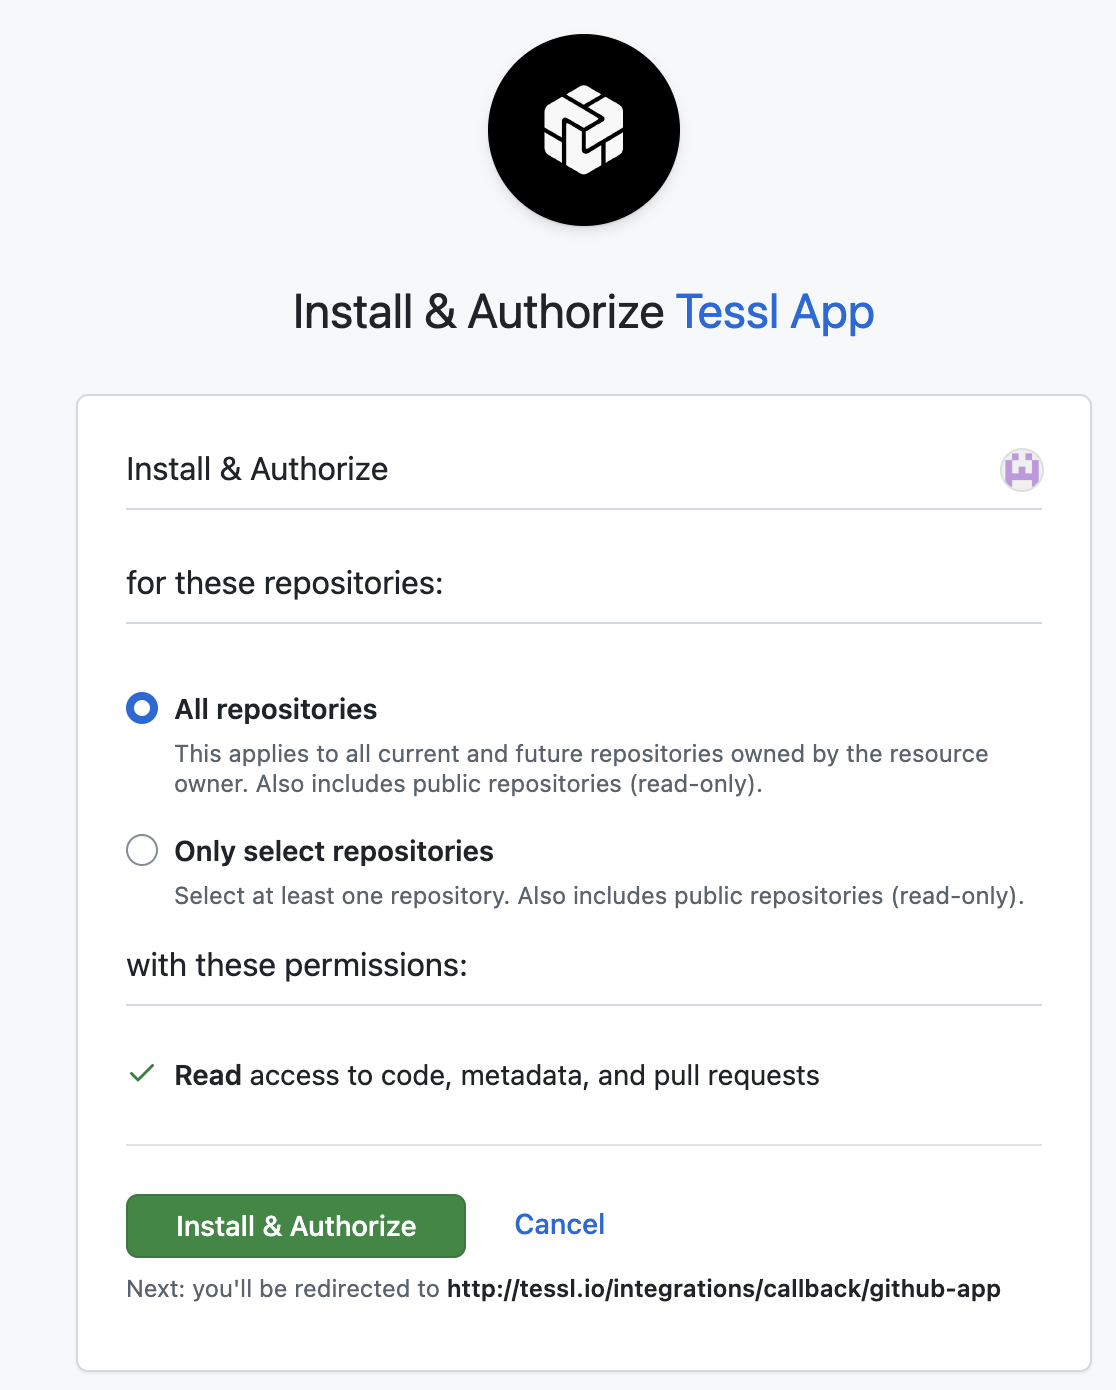
* Decide if you want to authorize Tessl on specific repositories or provide access to everything. Once selected, click *Install & Authorize*
* If the required permissions are available, the Tessl integrations screen shows **Connected**.
After the connection is created, Tessl may start a first scan of the repositories in scope. The connection can show **Connected** before a scan starts or finishes, or when scan provisioning is unavailable. Open the connection to check its scan status, retry a failed scan, or set its **Scan scope**.
## Review Context and Findings
When scan analysis succeeds and your Organization has an active workspace, Tessl starts indexing the repository skills it found. Without an active workspace, the scan still completes and its Context remains available, but indexing does not start. There is no private-indexing opt-in or manual first-party approval step.
Indexing, review, and security scoring run as separate background work. A skill can appear in **Context** before its scores are available, and scoring can fail without removing the Context item. Some advanced Finding details depend on your Organization's plan.
Select your Organization and open **Context** to browse the skills and configuration Tessl observed. Open **Findings** to inspect issues from the latest account scans. Organization members can view both pages. Organization admins can ignore or restore Findings and manage scan settings. See [Roles](/administrators/roles.md).
## Add or remove Repositories when *Only Select Repositories* are in use.
If you wish to later add repositories, you will navigate to the Tessl app in GitHub:
* Click *Configure* next to the Tessl App.
* Select or remove repositories as needed.
* Click *Save*.
## Troubleshooting
What if the option to **Add** the connection is not available? Confirm that you are an Organization admin, or ask an Organization admin to set up the connection. See [Roles](/administrators/roles.md).
---
# Agent Instructions
This documentation is published with GitBook. GitBook is the documentation platform designed so that both humans and AI agents can read, navigate, and reason over technical content effectively. Learn more at gitbook.com.
## Querying This Documentation
If you need additional information that is not directly available in this page, you can query the documentation dynamically by asking a question.
Perform an HTTP GET request on the current page URL with the `ask` query parameter, and the optional `goal` query parameter:
```
GET https://docs.tessl.io/distribute/connect-tessl-to-github.md?ask=&goal=
```
`ask` is the immediate question: it should be specific, self-contained, and written in natural language.
`goal` is optional and describes the broader end goal you are ultimately trying to accomplish on behalf of the user. GitBook uses it to tailor the answer towards what is most useful for that goal.
The response will contain a direct answer to the question and relevant excerpts and sources from the documentation.
Use this mechanism when the answer is not explicitly present in the current page, you need clarification or additional context, or you want to retrieve related documentation sections.


%20(1).png?alt=media)
%20(1).png?alt=media)
%20(1).png?alt=media)
%20(1).png?alt=media)